

16.7.08
News from the GFX front
Just read this article from tomshardware.com. It says that ATI HD4870 and HD 4850 provides the best "bang for buck" and can beat the GF X260. Maybe I need to rethink my system.... That ofcourse means thinking of new kickass mobo. Let's see what I can amuse you with later on.
15.7.08
New parts arrived
Yesterday I got the package containing the pump, temp sensors and the flow meter. Pretty fast delivery with the weekend in between and all. Luckily I got the tracking code from the net so I could claim the pack right away when it arrived and didn't have to wait for today for the claim ticket.
Now I can test at least the radiator efficiency and if I can get the grooves done for the tank, also the usefulness of having a custom tank like that. I'm keeping my fingers crossed.
Here's the stuff:
Aerocool Gatewatch 2, Thermaltake Flow TX plus and Swiftech MCP655
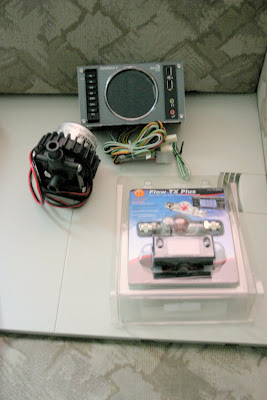
Looks good. Can't wait to get to test them. That'll be maybe next week or so, because now I need to design the case before I go to my parents' again to build it.
11.7.08
Making the tank
Yesterday I was able to almost finish the tank. I got everything else except the grooves done. Thinking about how long it took to make 30 of those 40mm grooves took about 2 hours I'd been over at the shop for all the weekend milling 30 of 200mm grooves. So I decided to make or have them made later on another machine. Seems like my work buddy is also too busy to help me with them next week. I'll try to figure something out so I can go on testing how efficient the tank actually is.
I started by making the bottom, so I'd have more solid place to grip it for the second phase. Here's the piece before anything has been done.
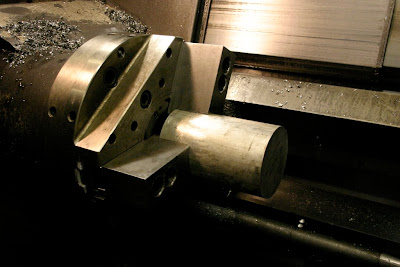
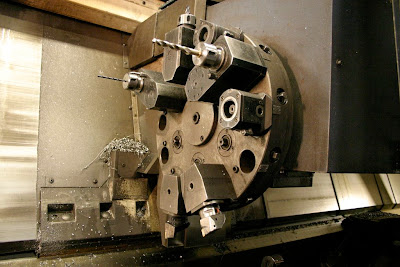
And some tool setup. I had to change them manually, because there was not enough room for all the tools at once in the revolver.
Outer finish being done.
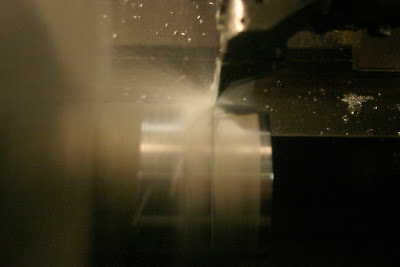
Drilling the holes for the M6 threads. In the next stage I also drilled the holes for the 1/4" threads where the tubing is to be attached.
When finished I saw that the piece was not perfect cylinder and I had to remove that raw surface you're seeing. So had to make 0.5mm cone this end. I could not make it smaller all the way because the cap would then seem a little bigger. Not much but enough to annoy me.
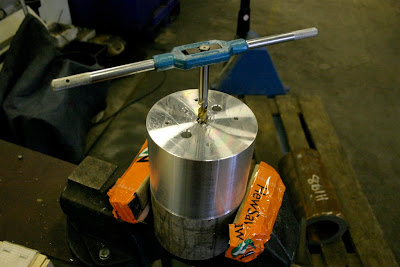
I tapped the holes by hand because of the extra coding and tool setup it would've needed I had them done before I'd even finished taking out the tools.
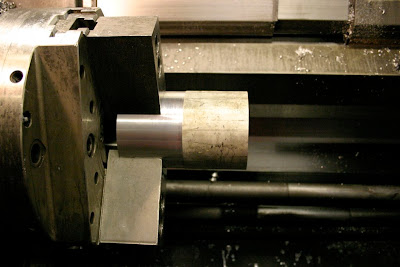
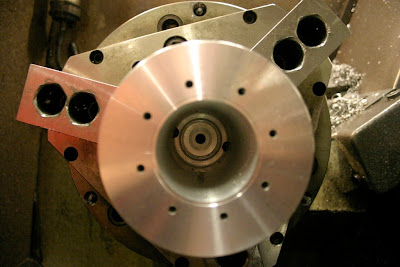
The second phase ready to go.
Outer finish and the cap attachment holes ready. I tapped these holes by hand too after doing a few millimeters start with the machine so I'd get them straight.
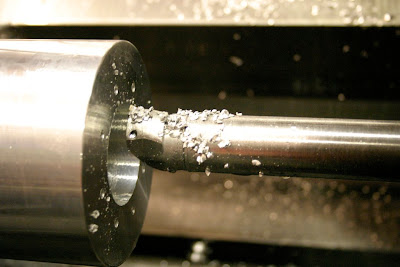
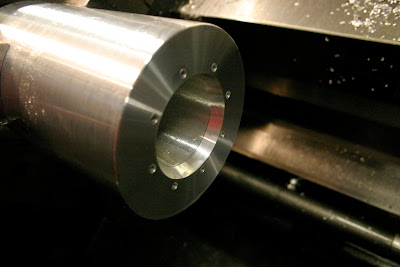
Drilling the initial hole for the tank interior. After measuring the inside, I ran into a problem. I didn't have tools long and thin enough to make the interior like I've drawn so there's a little compromise in the bottom. It should work anyway since it's only liquid that's going around in there.
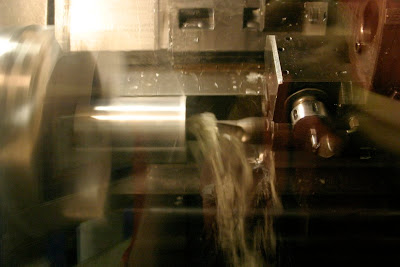
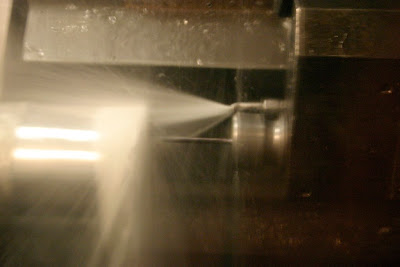
Machining the inside produced a lot more chips than I thought, so after every round I had to blow the hole clean. The interior was finished after this. I did not polish the interior so there's a little more surface to absorb the heat but I don't know how the bubbles will stick onto it. That remains to be seen.
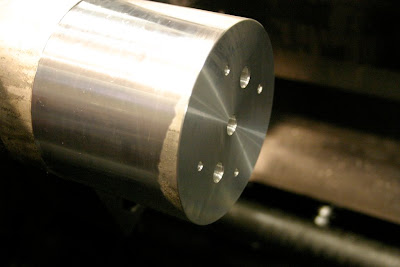
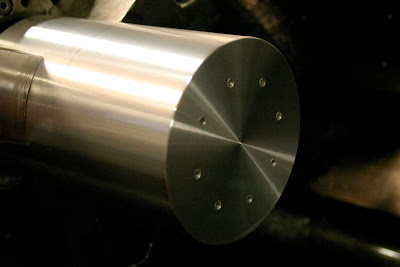
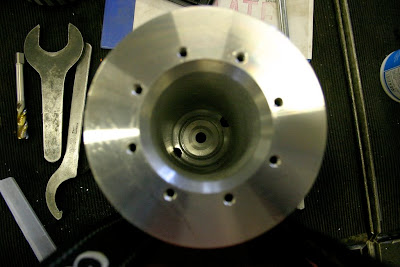
Here you can see the holes in the bottom. They came out pretty well. The intakes are on the outer diameter elevated a bit and the outlet is in the center so the possible bubbles won't get sucked into the system again. The cone for the cap is still to be done.
Cone done. I had to prove the fit a few times before it was good.
And here's the almost finished product. Still needs the grooves, but I think it's gonna look awesome.
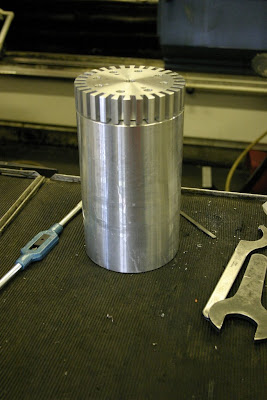
The tank needed about 10 hours of working time (coding included) so far.
I started by making the bottom, so I'd have more solid place to grip it for the second phase. Here's the piece before anything has been done.

And some tool setup. I had to change them manually, because there was not enough room for all the tools at once in the revolver.

Outer finish being done.

Drilling the holes for the M6 threads. In the next stage I also drilled the holes for the 1/4" threads where the tubing is to be attached.

When finished I saw that the piece was not perfect cylinder and I had to remove that raw surface you're seeing. So had to make 0.5mm cone this end. I could not make it smaller all the way because the cap would then seem a little bigger. Not much but enough to annoy me.

I tapped the holes by hand because of the extra coding and tool setup it would've needed I had them done before I'd even finished taking out the tools.

The second phase ready to go.

Outer finish and the cap attachment holes ready. I tapped these holes by hand too after doing a few millimeters start with the machine so I'd get them straight.

Drilling the initial hole for the tank interior. After measuring the inside, I ran into a problem. I didn't have tools long and thin enough to make the interior like I've drawn so there's a little compromise in the bottom. It should work anyway since it's only liquid that's going around in there.

Machining the inside produced a lot more chips than I thought, so after every round I had to blow the hole clean. The interior was finished after this. I did not polish the interior so there's a little more surface to absorb the heat but I don't know how the bubbles will stick onto it. That remains to be seen.

Here you can see the holes in the bottom. They came out pretty well. The intakes are on the outer diameter elevated a bit and the outlet is in the center so the possible bubbles won't get sucked into the system again. The cone for the cap is still to be done.

Cone done. I had to prove the fit a few times before it was good.

And here's the almost finished product. Still needs the grooves, but I think it's gonna look awesome.


The tank needed about 10 hours of working time (coding included) so far.
10.7.08
Finished the cap.

The second phase of the cap was way faster and easier to do. No drilling, no milling just remove the stuff and finish. I did measure the length of the piece a bit wrong so I had to run the program again after moving the zero-point about a millimeter. See the difference.


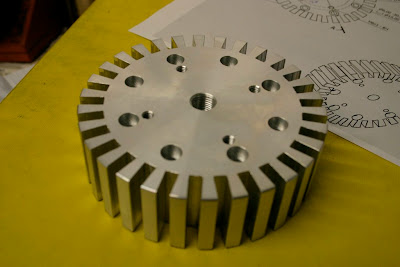
Then just remove the excess and voilá.


Have you ever seen prettier thing than that? Ooooh, it's shiny!!
New parts and some other progress
I got first phase of the tank cap done yesterday. All in all it took way longer than I expected. I made the NC program ready before so I could go ahead for program testing and setup straight away. I started setting up the lathe at 1400 and the first phase was finished at 1730. Milling the grooves took most of he time and based on that experience I'm going to find another way to make the grooves for the tank itself.
Here are some pics of the working process. Too bad that the initial setup pics were destoyed, thanks to the old Mavica and the disks the company has for these purposes and of course I forgot to take my own camera with me. How nice that no one uses diskettes anymore...
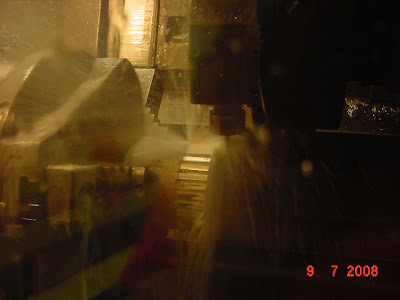
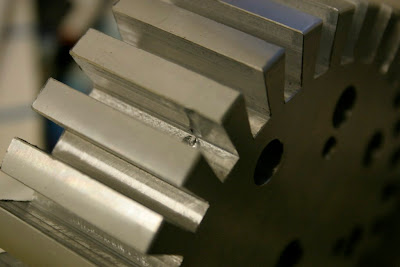
Milling the grooves. Almost 2 hours of that already done in this pic.
I managed to break a few of those cutters because of too high feed values and too deep cut. I changed the 5mm cutter to 6mm and took only 2.5mm deep cuts at time also reduced the feed rate alittle bit. Problem solved.
If you take a really close look, you might see my boo-boo there.
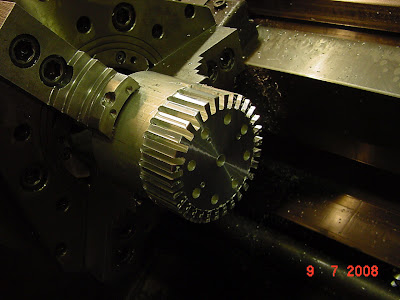
Finished first phase. Now to remove the excess material and we're ready for the second phase I hope I can do today.
Here's the stuff I needed to get rid of and the first phase ready

Then I ordered some new parts. Here's the list.
Thermaltake Flow TX+ 25.00 eur
Swiftech MCP655 89.00 eur
Arctic Silver Arctic Alumina 5.00 eur
Aerocool GateWatch 2 Black 44.40 eur
Adding the S&H the total is 171.10e
Lets see how fast they are.
Here are some pics of the working process. Too bad that the initial setup pics were destoyed, thanks to the old Mavica and the disks the company has for these purposes and of course I forgot to take my own camera with me. How nice that no one uses diskettes anymore...

Milling the grooves. Almost 2 hours of that already done in this pic.
I managed to break a few of those cutters because of too high feed values and too deep cut. I changed the 5mm cutter to 6mm and took only 2.5mm deep cuts at time also reduced the feed rate alittle bit. Problem solved.
If you take a really close look, you might see my boo-boo there.


Finished first phase. Now to remove the excess material and we're ready for the second phase I hope I can do today.
Here's the stuff I needed to get rid of and the first phase ready


Then I ordered some new parts. Here's the list.
Thermaltake Flow TX+ 25.00 eur
Swiftech MCP655 89.00 eur
Arctic Silver Arctic Alumina 5.00 eur
Aerocool GateWatch 2 Black 44.40 eur
Adding the S&H the total is 171.10e
Lets see how fast they are.
8.7.08
Two words
Two words pretty high on my vanity hate list are "My Blog". I just can't stand people being so important about "their blogs" and thinking they are special because they have a blog to spread out their pathetic lives, meaningless opinions and stupid pictures. Come on! Everyone can make a blog and unfortunately they do so.
This will also be the only post of me writing about my pathetic life, opinions, feelings or whatever. I like to keep some things to myself and share them to the people I want, not just every "Joe Surfer".
Now I've jumped on the bandwagon, but rest assured, this is the last and only time you'll see me saying "My Blog". It's just a diary of the computer project, nothing more, nothing less. Doesn't make me better person or the champion of the Internet.
If you enjoy reading it or it helps you in any way, all the better because that's the reason I've started My Blog.
Enough for the off topic. The rest will be strictly project related.
New parts list and blueprints
Just got mail from Jimm's PC store them telling that GF8800GTS is obsolete and it's not possible for them to get the BFG's watercooled model. Moreover I could not find even ASUS 8800GTS on their webshop. So I decided to put together a new list of parts.
That's the most expensive I would ever go and gives a good outline for future refinements of the list.
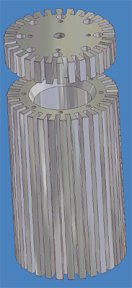
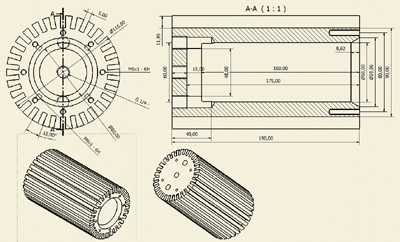
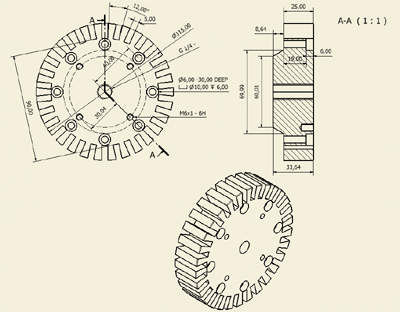
I managed to put together the blueprints for the water reservoir.
| Striker II Extreme, S775 NF790I SLI, DDR3, SATA2 2*GBLAN | 353.00€ | 353.00€ | |||||
| SpinPoint 3.5" 750GB SATAII 32MB 7200rpm | 85.40€ | 170.80€ | |||||
| CORE 2 DUO E8400 3.0GHZ 1333MHz 6M S775 | 159.00€ | 159.00€ | |||||
| Swiftech MCP655 waterpump | 89.00€ | 89.00€ | |||||
| 1000W, Dark Power Pro, ATX 2.2 | 259.00€ | 259.00€ | |||||
| HyperX 2GB 1800MHz DDR3 Non-ECC CL8 kitx2 (2x1024mb) | 257.00€ | 257.00€ | |||||
| GeForce 9800GX2 1024MB (PCI-E/DDR3/HDMI/2xDVI) | 449.00€ | 449.00€ | |||||
| DVD+-RW Dual Layer, SH-S203N/BEBN, Light Scribe | 27.00€ | 27.00€ | |||||
| Total: 1763.80€ | |||||||
That's the most expensive I would ever go and gives a good outline for future refinements of the list.
I managed to put together the blueprints for the water reservoir.


Subscribe to:
Posts (Atom)